For customers of a wholesaler’s website, quickly finding products or adding them to the cart should be seamless. The ManageMore WooCommerce Barcode Scanner provides an easy-to-use shortcode that allows customers to scan barcodes, lookup products, and even add them to their cart automatically. This guide focuses on implementing and customizing the shortcode for an enhanced user experience.
Shortcode Options and Implementation
The ManageMore WooCommerce Barcode Scanner shortcode is part of the ManageMore Connector Plug-In. It is easy to implement and supports multiple customization options. We suggest adding the button near your search field, in the header of your site.
Basic Shortcode Usage
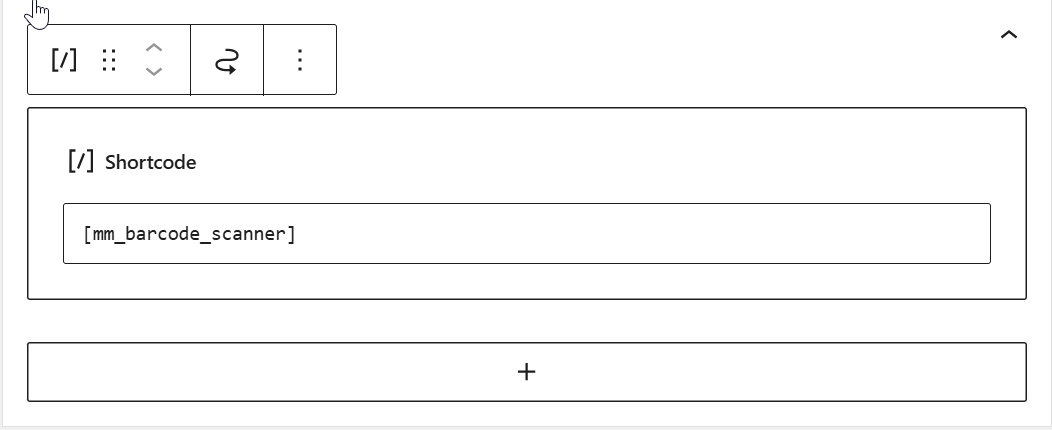
To embed the barcode scanner anywhere on your website, use:
[mm_barcode_scanner]
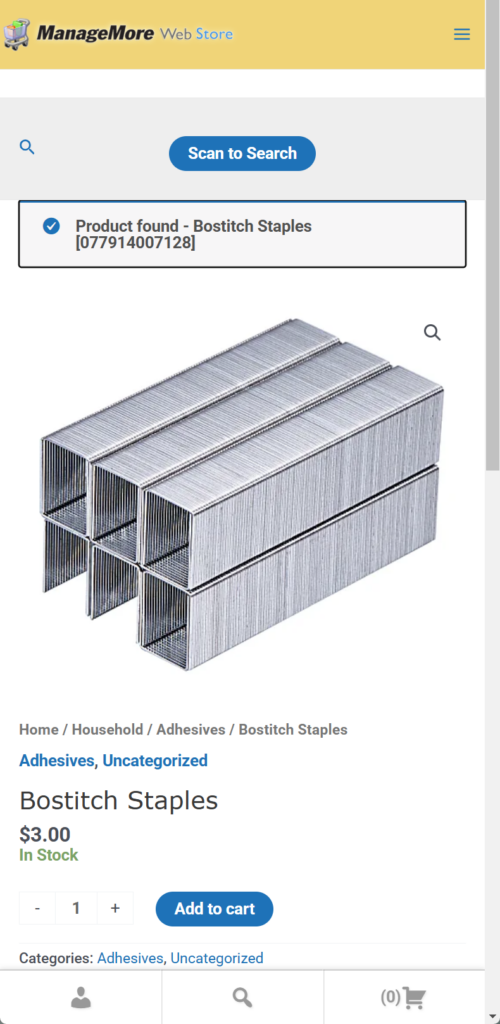
This will display a button, that invokes scanner interface using the device camera where customers can scan barcodes to search for products, and optionally add to cart.
Adding as a Widget
For ease of implementation, you can add the shortcode as a widget, to appear anywhere your site can display a widget. (Header, Sidebar, etc.) To add a widget, navigate to Appearance … Widgets in the main WordPress Menu. This may also be available in WYSIWG mode in Appearance … Customize. Next, select the widget area where you would like the button. In our case, we selected the Header Widget 1, which can be added to our theme’s header. Be careful not to add the button more than once on your page, since the second one will not function properly, even if the first one is hidden in another viewport.
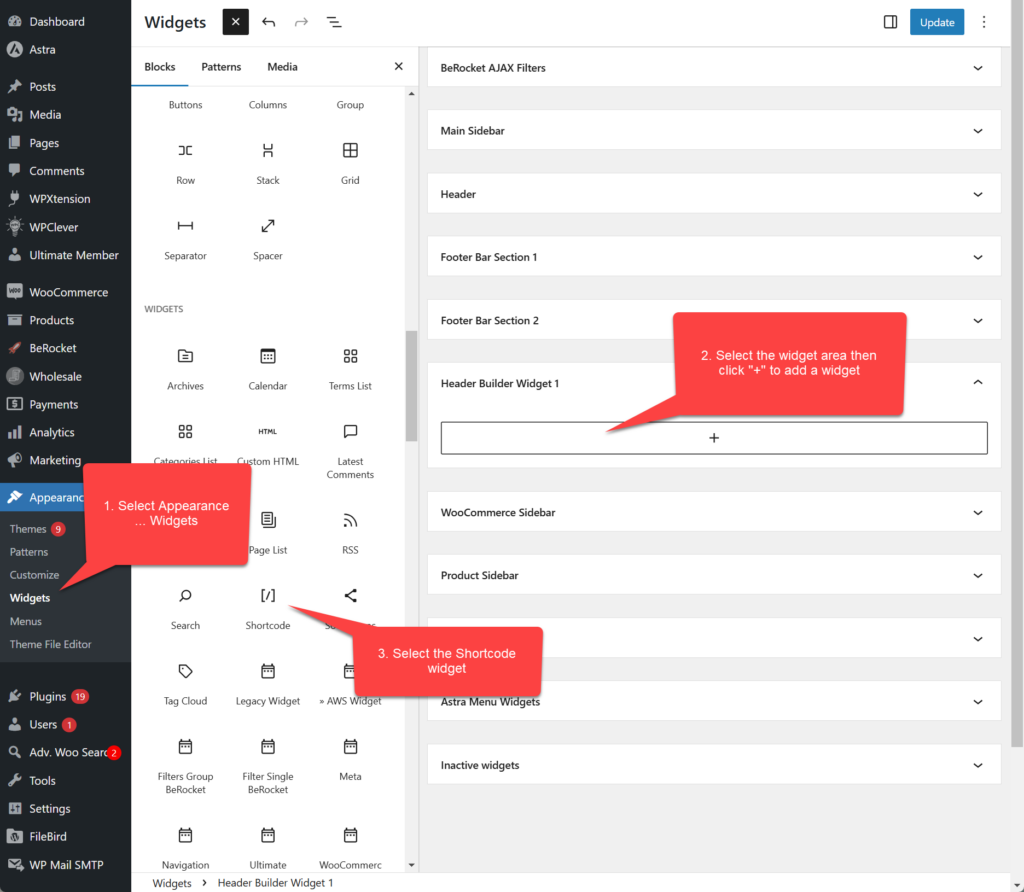
Then, enter the short code and any parameters in the shortcode field.
Optional Shortcode Parameters
The shortcode supports various options to tailor its functionality:
button_text
- Custom button label.
Default: “Scan to Search” or “Scan to Add” (if auto_add is enabled)
Example Usage: [mm_barcode_scanner button_text=”Start Scanning”]
auto_add
- true – Automatically adds scanned products to the cart.
Example Usage: [mm_barcode_scanner auto_add=true] - cart – Automatically adds scanned products to the cart and redirects the user to the cart page.
Example Usage: [mm_barcode_scanner auto_add=cart]
success_message
- Custom message for successful scans.
Default: “Product found – %product_name% [%barcode%]”
Default (auto_add): “1 – %product_name% added to cart.”
Example Usage: [mm_barcode_scanner success_message=”%product_name% has been added to your cart!”] - Available placeholders:
-
- %product_name% – The name of the scanned product.
- %barcode% – The scanned barcode.
not_found_message
- Custom error message when no product is found.
Default: “No product found for barcode: %barcode%.”
Example Usage: [mm_barcode_scanner not_found_message=”Barcode %barcode% did not match any product.”] - Available placeholders:
- %barcode% – The scanned barcode.
How Customers Can Use the Scanner
Once implemented, customers can use the barcode scanner as follows:
Looking Up a Product
Click the Scan Button
![]()
Scan the product barcode.

The product details will appear on the screen.
Adding a Product to the Cart (Auto-Add Mode)
If auto_add=true is enabled, the product will be automatically added to the cart upon scanning.
If auto_add=cart is enabled, the product will be added, and the user will be redirected to the cart page.
Customers will receive a confirmation message.
Benefits for Wholesale Customers
Quick Product Search: No need for manual searches, just scan and find.
Seamless Ordering: Auto-add feature allows easy order placement.
User-Friendly: Customers can lookup products efficiently from their dashboard.
Conclusion
The MM Woo Barcode Scanner shortcode simplifies product lookup and ordering for wholesale customers. By embedding the shortcode with the right parameters, wholesalers can improve the user experience and streamline the purchasing process. Implement it today to offer a faster, more efficient way for customers to find and order products!